The Agent and Campaign Scheduler allows you to create and customize the schedule of a campaign or for a particular agent.
To start, go to the Manage Tab >>> Then click Schedule:
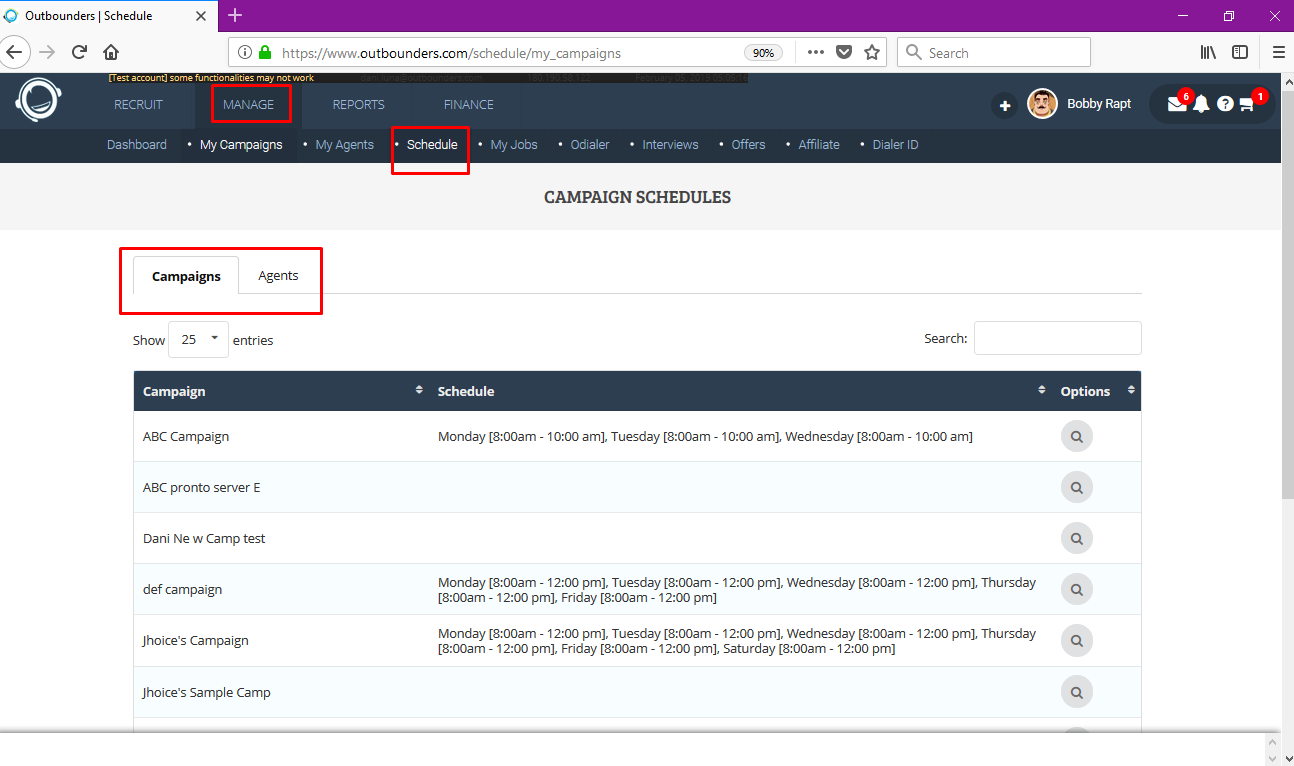
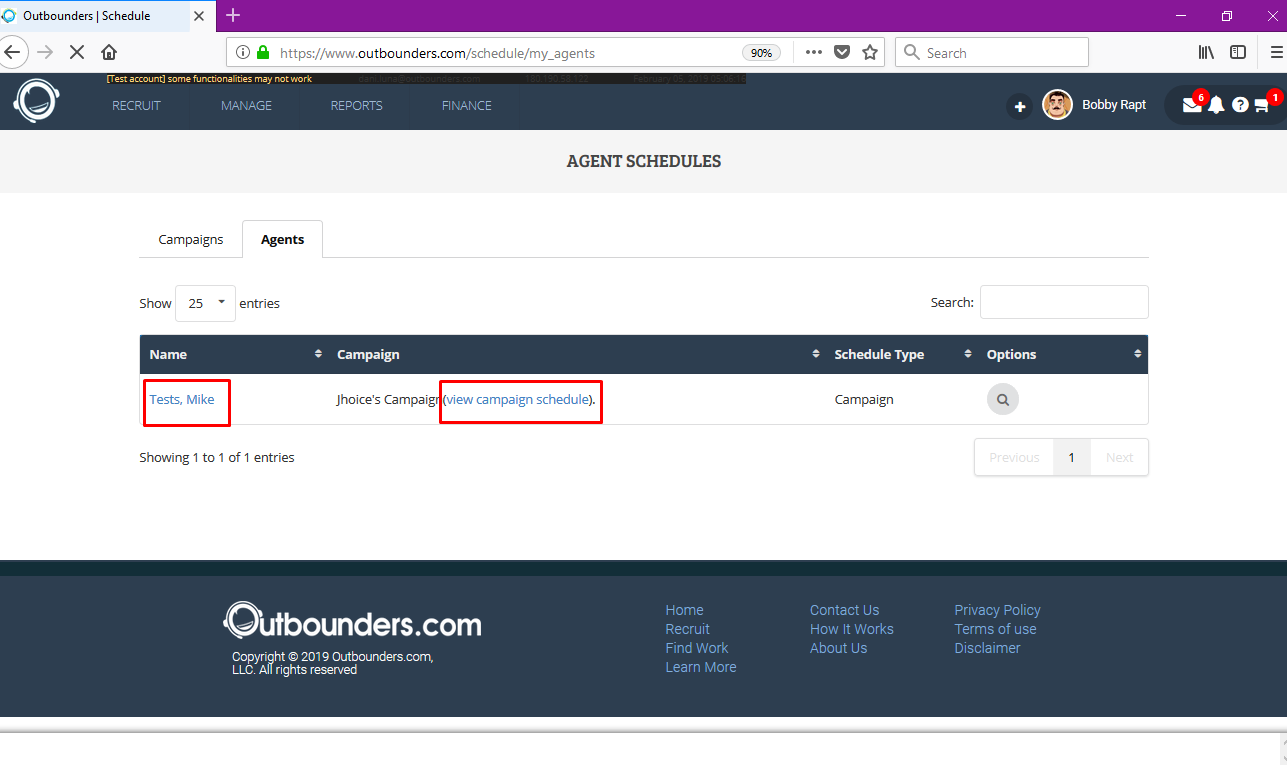
You will then be able to view your agents along with what campaign they are in. To begin editing the campaign click View Campaign Schedule
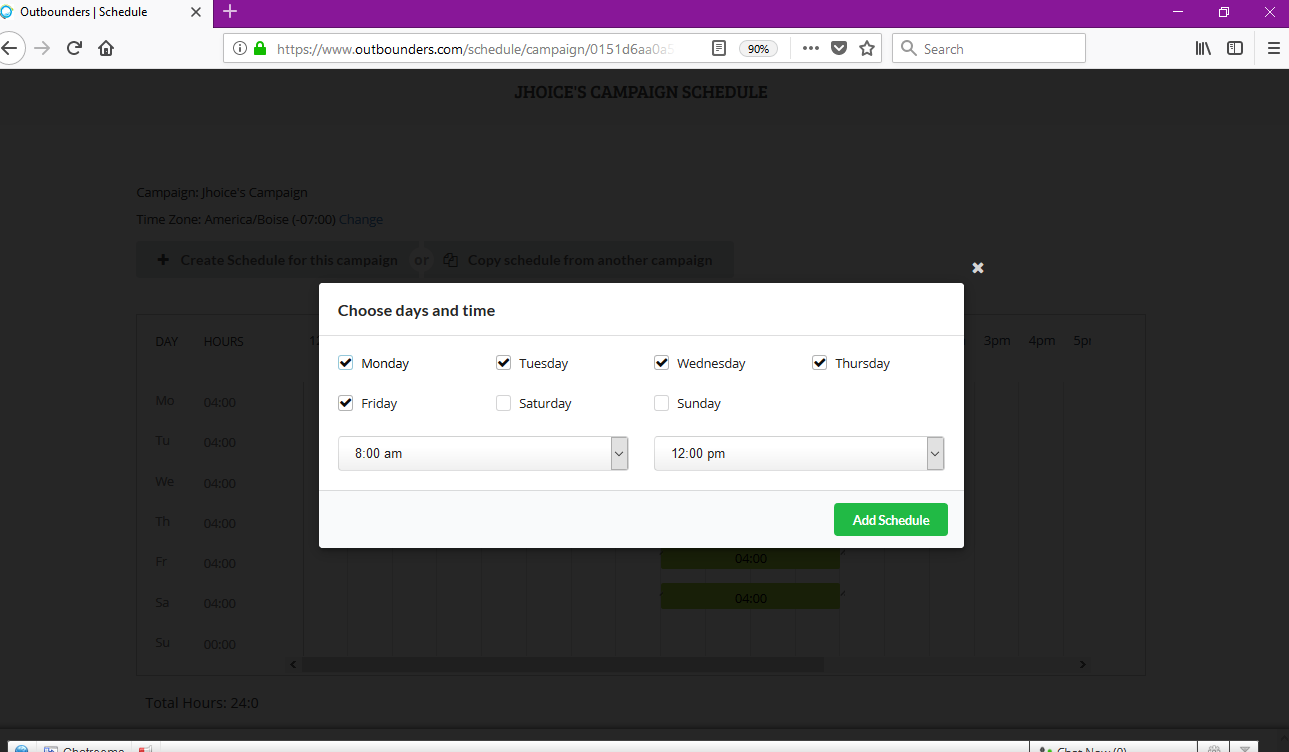
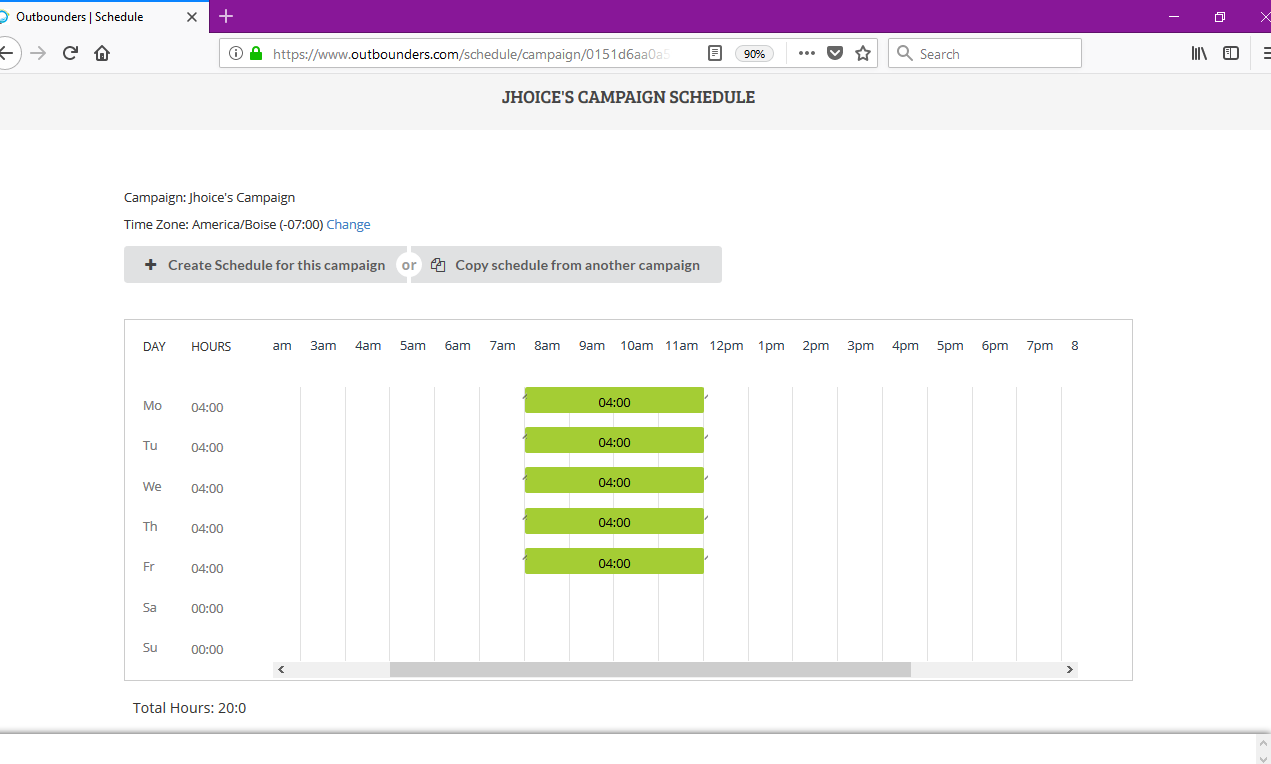
You will then be presented with a chart with times and the days of the week. Here is where you will have a visualization of your campaign’s schedule. To add to the schedule click Create Schedule or Copy schedule from another campaign
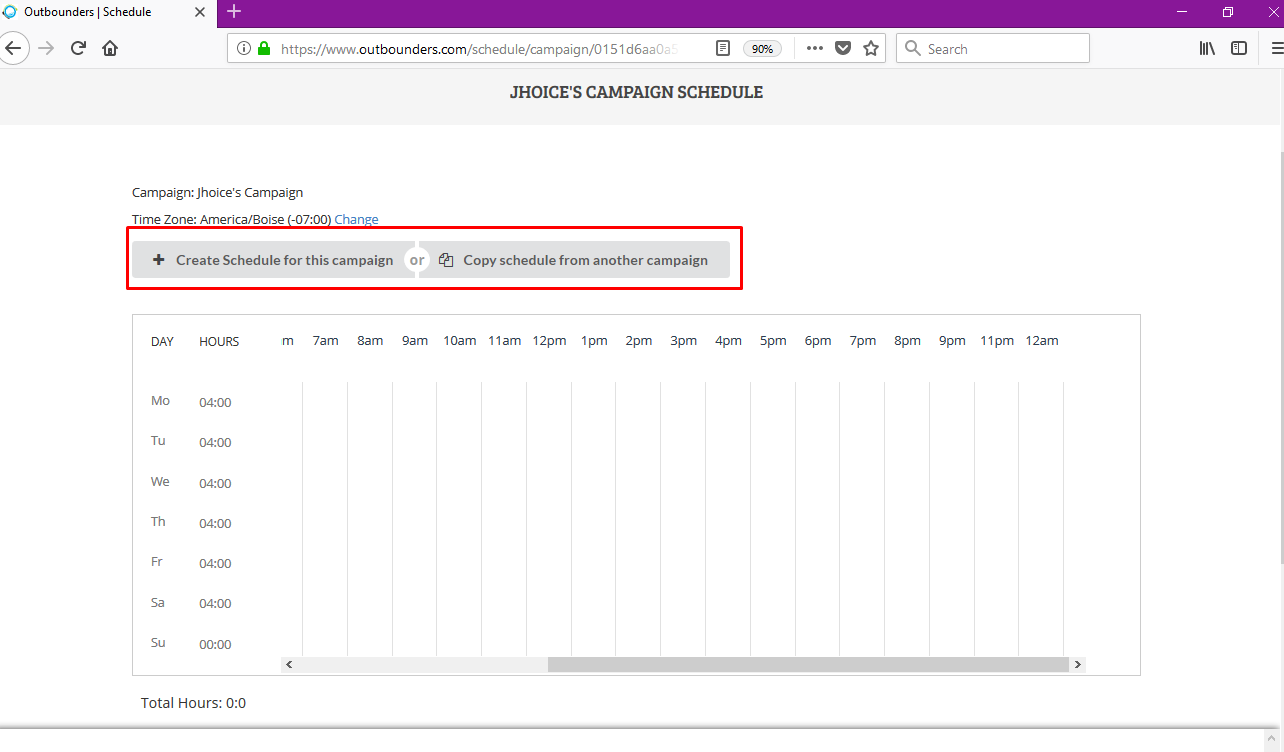
A window will pop up with options to check off the days of the week and scheduled times. Once finished, click Add Schedule.
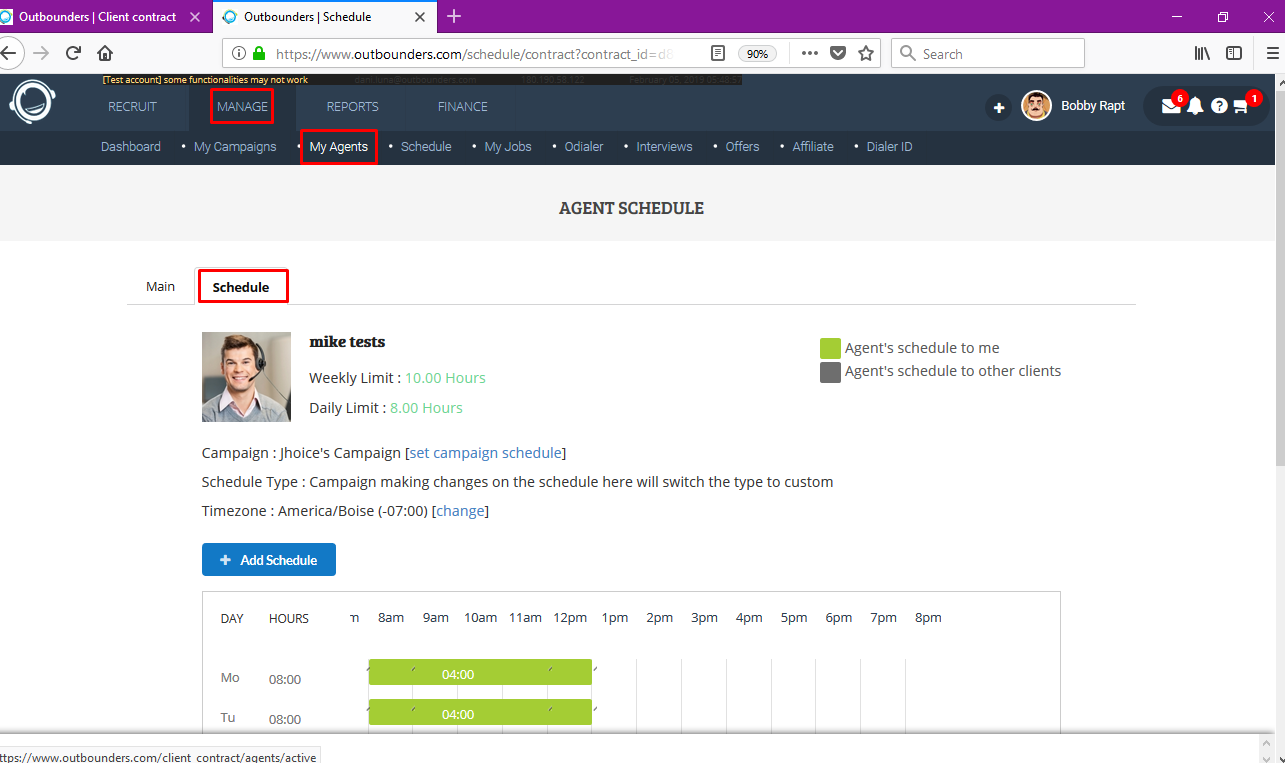
Once finished, you should see green bars that will indicated the times your agents are scheduled to work. You may edit this right from the chart itself by clicking on the green bars and resizing them.
This will be the default schedule for the agent assigned to the campaign. But if you want to customize the agent’s schedule, you can go to Manage then choose my agents. Click on agent name and click on schedule tab.